Dashboards are a great way to represent data visually within an organization. They can show how you have performed in the past and what’s happening at the moment - two keys to any business that wants to be successful.
Normally, dashboards in Salesforce are run based on one user for the entire organization. Meaning the dashboard looks the same for all users within the organization. This is great if you are trying to display how close your company is to its year-end sales goal, but what if you want each user to see a dashboard of how close they are to their own sales goal?
For Example: John and Mary are both salespeople in your organization whose security settings only allow for them to read sales that they own. Currently, your dashboard showing year-to-date sales figures is a standard dashboard, with the running user set as a system administrator. Therefore, both John and Mary see the dashboard of the year-to-date sales of the entire company. You want to create another dashboard showing both John and Mary their sales numbers individually, without giving one access to the other’s information.
Dynamic dashboards allow each user to see the data they have access to according to the security settings that are in place. Without read access to a record, that record will not be accounted for in the dashboard. This allows you to control data visibility without having to create separate dashboards.
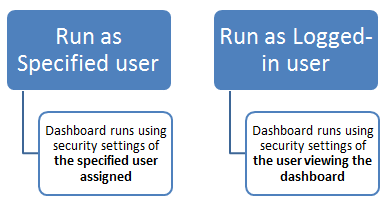
Creating a dynamic dashboard vs. a standard dashboard is essentially the same process, with one major difference. Since a dynamic dashboard should run according to the security settings of a the user who is viewing the dashboard, and not a specified user all the time, the “Running User” selection should be changed from the standard, “Run as Specified User” selection to, “Run as Logged-in User” which changes the security settings on the dashboard to match that of the user who is logged-in at the time of viewing.

Since we already know how to create a standard dashboard, creating a dynamic dashboard will only involve a few extra steps. In fact, by performing the following actions you can also easily change a standard dashboard to a dynamic dashboard. To create a dynamic dashboard, there are two steps - controlling access to the dashboard and controlling access to the data.
Note:
In Salesforce Classic, dashboards can be scheduled to automatically refresh its data. Dynamic dashboards, where a dashboard is run based on the logged-in user, cannot be scheduled. However, in Lightning Experience, automated dashboard refreshes are not available at all. A Refresh button is provided on the dashboard instead to manually refresh its data.
To control access to the dashboard:
- In the Dashboards Tab, click on the New Folder button to create a New Dashboard Folder:

- Enter a name for the new Dashboard folder:

- Inside the newly created Dashboard folder, click on the Share button in the dropdown menu to display more options:
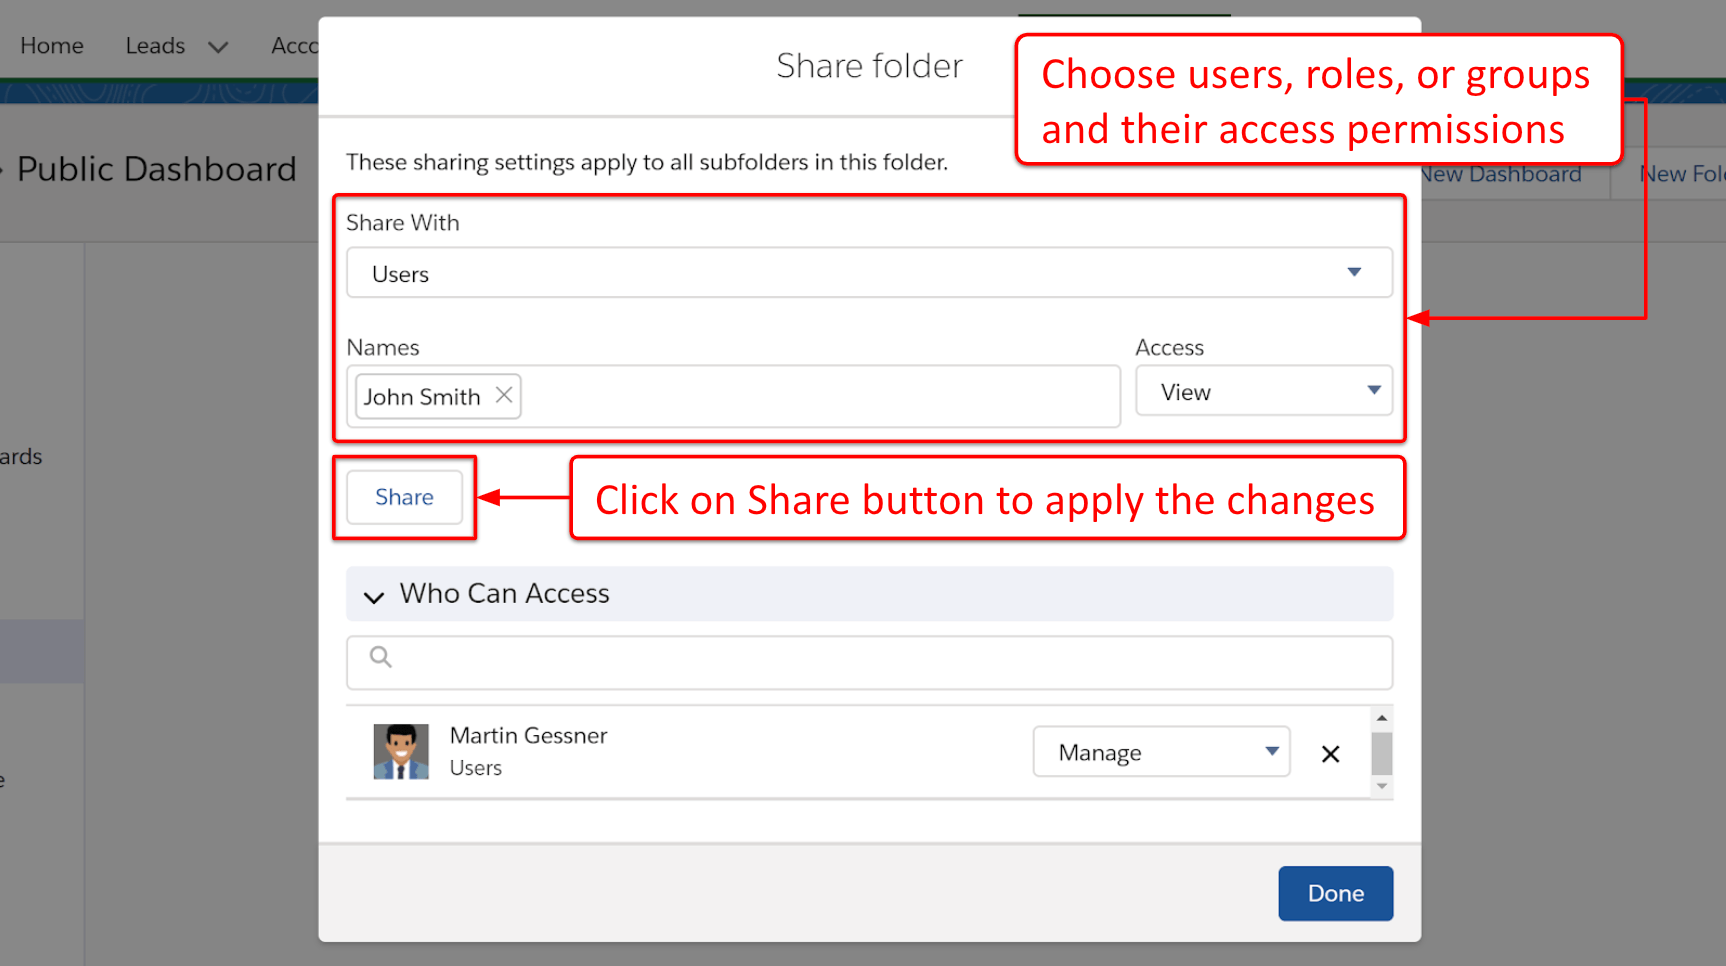
- Select the users/roles and access level, and click on the Share button.
- Now your dashboard folder is ready to contain dashboards where only users you have given permissions can gain access. So, on to the second part.
To control access to the data within the dashboard itself, we need to change the settings within the dashboard to run as the logged-in user so that the user logged-in will view the dashboard according to their own security settings. To do this:
- Open the dashboard you need to configure and click on the button with the gear icon to open the Properties window.
- In the View Dashboard as settings, select the option "The dashboard viewer", which refers to the logged-in user

The option to “Let dashboard viewers choose whom they view the dashboard as” will allow any user with permissions to change the running user when viewing the dashboard. These include users with the following security settings:
- “View My Team’s Dashboards” allows viewing as any user below them in the role hierarchy.
- “View All Data” allows viewing as any user in the organization.
- “Enable Other User’s Dashboard” allows for editing of the dashboard if allowed access, even if they aren’t the running user.
You have now created a dynamic dashboard that will show data according to each user that is logged-in at the time of viewing. Remember, you can create dashboards using many different kinds of visual representation as well as underlying reports, so feel free to get creative!
What Certification are you studying for now?
Focus on Force currently provides practice exams and study guides for sixteen certifications


what about on Lighting?
Hi Ruben, this is an old blog post, from 2015. We will work on update and add Lightning screenshots.