In the Winter 16 release, Salesforce has introduced a new feature – the Omni-Channel, which is based on a principle of getting work to the right person at the right time. It helps put rules in place to allow the system to determine the importance of work items, and pass it on the right person who is available.
Salesforce Omni Channel is built on 4 Functional Blocks:
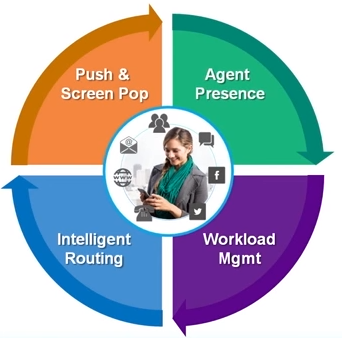
Image Courtesy: Salesforce
Presence is the capability for an agent to set and advertise their availability. Similar functionality is available for the Live Agent and CTI product, but it has now been extended to work in a channel agnostic manner.
The Workload Management module ensures that an agent is not over utilized (or under-utilized), and only has the right amount of work allocated.
Intelligent Routing dictates the routing logic which decides upon the ‘importance’ of an element of work, and queues it for the appropriate agent in the right order of priority.
Push and Screen Pop is the functionality to push items to display in the Omni Channel widget within the service console.
Omni channel have been built with the concept of using the Salesforce objects itself, as the work items – and not the channel elements (like email, incoming call, SMS, etc.). Which means that, regardless of what channel the case is raised or updated through – it always gets treated in a unified manner. As it is the case record that is being monitored as the element of work.
Omni channel drives behavior change for an agent – instead of having to monitor queues (list views) of work items – like leads, cases, etc. to one where the system pushes the work items onto the agent’s screen. This could help with the situation where agents ‘cherry pick’ items from a queue as work is assigned directly to them.
Setting up Omni Channel
Currently, Omni Channel is available as part of the Service Cloud license – and at an additional cost for customers without a Service Cloud license. It is made available in the Enterprise, Performance, Unlimited, and Developer Editions.
A nice aspect about Omni Channel for administrators is that, the setup screen has a detailed list of tasks that need to be completed to enable the Omni-Channel functionality.
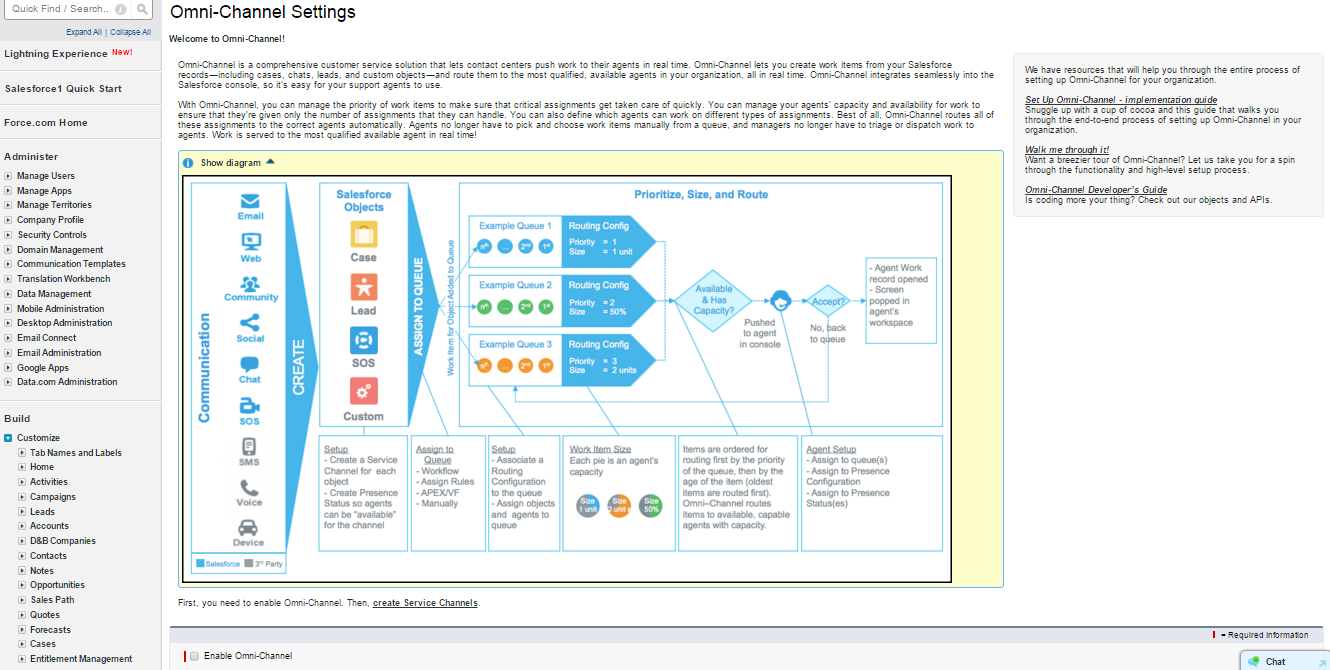
Omni Channel needs to be enabled and configured from the Omni Channel menu within setup.
Use Case
To demonstrate how Omni Channel works, let us consider the following use case. A business wants to ensure that service agents, take care of high priority cases before working on any other cases.
The first step after enabling Omni-Channel is to create a Service Channel. By this, you are defining the set of Salesforce objects that are to be identified as work items by the Omni Channel routing engine. Salesforce supports not only Cases, but Chats, SOS video calls, knowledge articles, social posts, orders, leads and custom objects.

After defining a Service Channel, you need to define a routing configuration – which tells the system the priority of each work item, and the amount of time the work item should take. This information is captured in a ‘routing configuration’ record, and is then associated to a ‘Queue’. That is, you are essentially making the existing queue mechanism equipped to go through a routing logic.
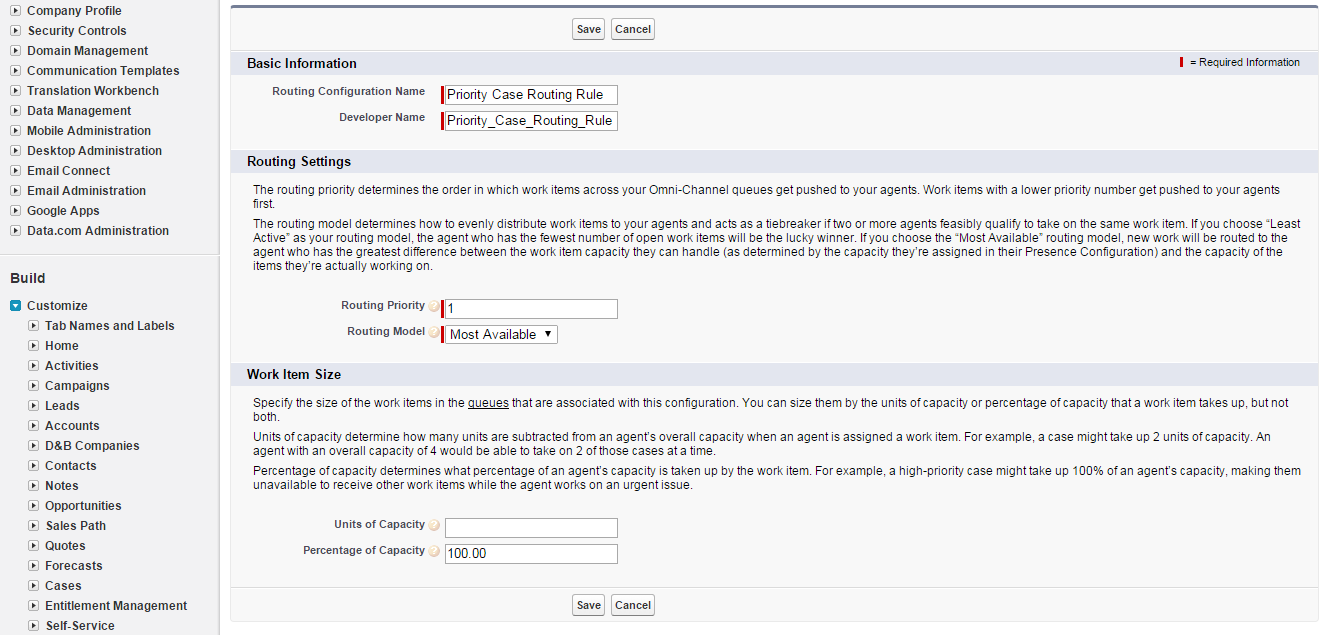
Similarly, a separate rule for non-priority case routing is also set up, and assigned to a lower routing priority.

The routing configuration are assigned to queues, from the queue definition page. In the org, there are two queues created for catering to High Priority and Non-Priority cases. Each of these have been assigned to the respective routing configurations. The case assignment rules ensure the right assignment of cases to the queues, based on the value on priority field.

Notice the new “Routing Configuration” look up field on the queue definition page which allows a queue to be linked to a routing configuration defined through the Omni Channel settings.
Now the routing rules, priority and queues have been set up. The next step is to enable the agents to support the Omni Channel feature.
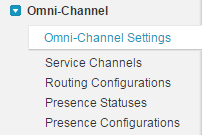
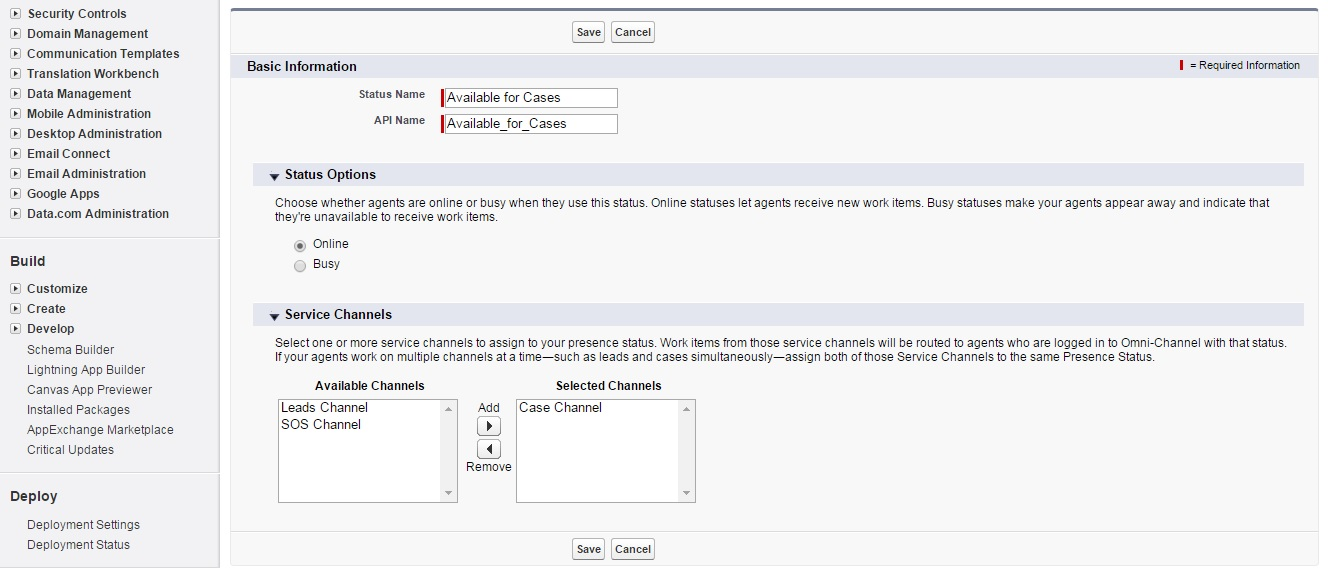
First, the set of statuses that an agent can choose to announce their availability has to be defined. These are defined through the “Presence Statuses” setting. A presence status can be of two types – online or busy. Busy status would indicate that the agent is not available to service the work items. Presence statuses can be linked to multiple service channels, if you have agents who can cater to more than 1 type of work at a time – for example in an SME scenario where the same agent handles cases as well as outbound lead nurture calls.
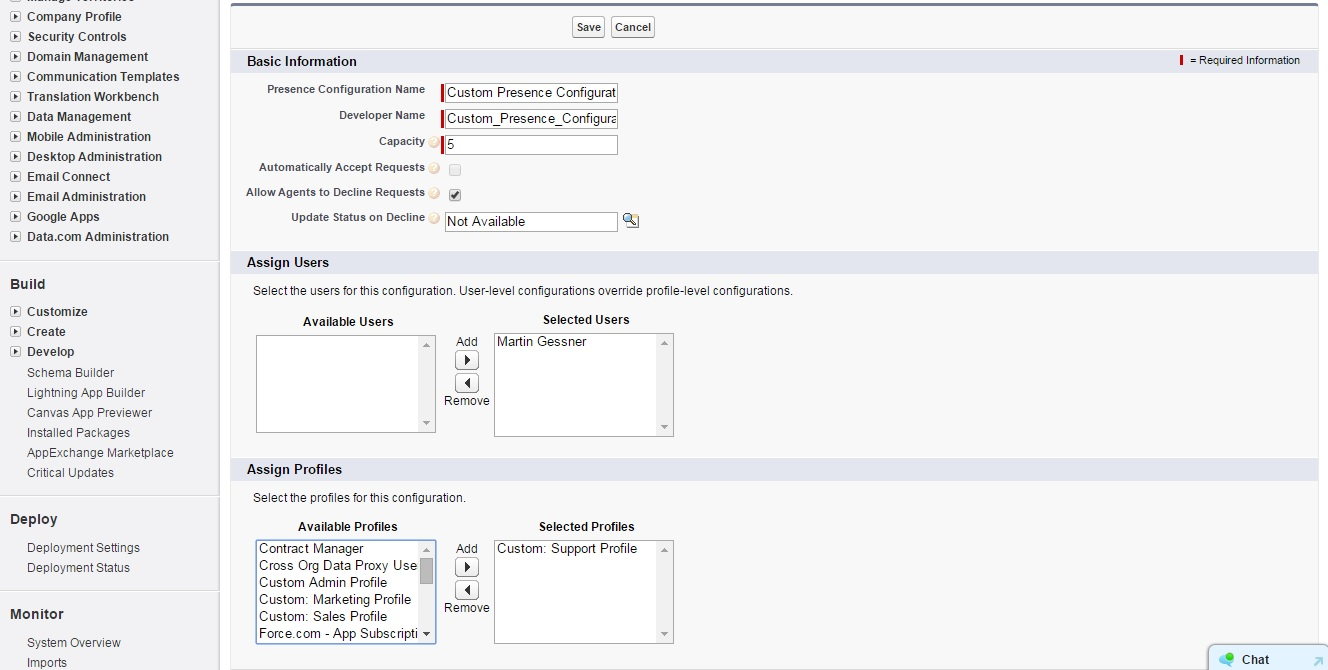
Finally, you can configure the behavior of the Omni Channel engine, and the array of options which your agents get using the “Presence Configuration” settings. Here you would define behaviors such as, whether an incoming work item is automatically (forced) accepted by the assigned agent, whether he has the capability to decline a work item, and the users which the configuration applies to.
Once done, your Omni Channel engine is ready for use. However, note that it needs to be exposed as a footer component in the Console layout for the agents to be able to use it. This component is called the ‘Omni Channel widget’. The fields displayed in the widget can be customized using the primary compact layout for the work item object.
Once an agent logs in, he would be able to see the Omni Channel widget on the console layout, and can make himself available using the presence status.

Now, creating a case of high priority would get routed to the Omni Channel widget for an agent who has 100% availability, and he would not get any other case items until the high priority case is resolved.
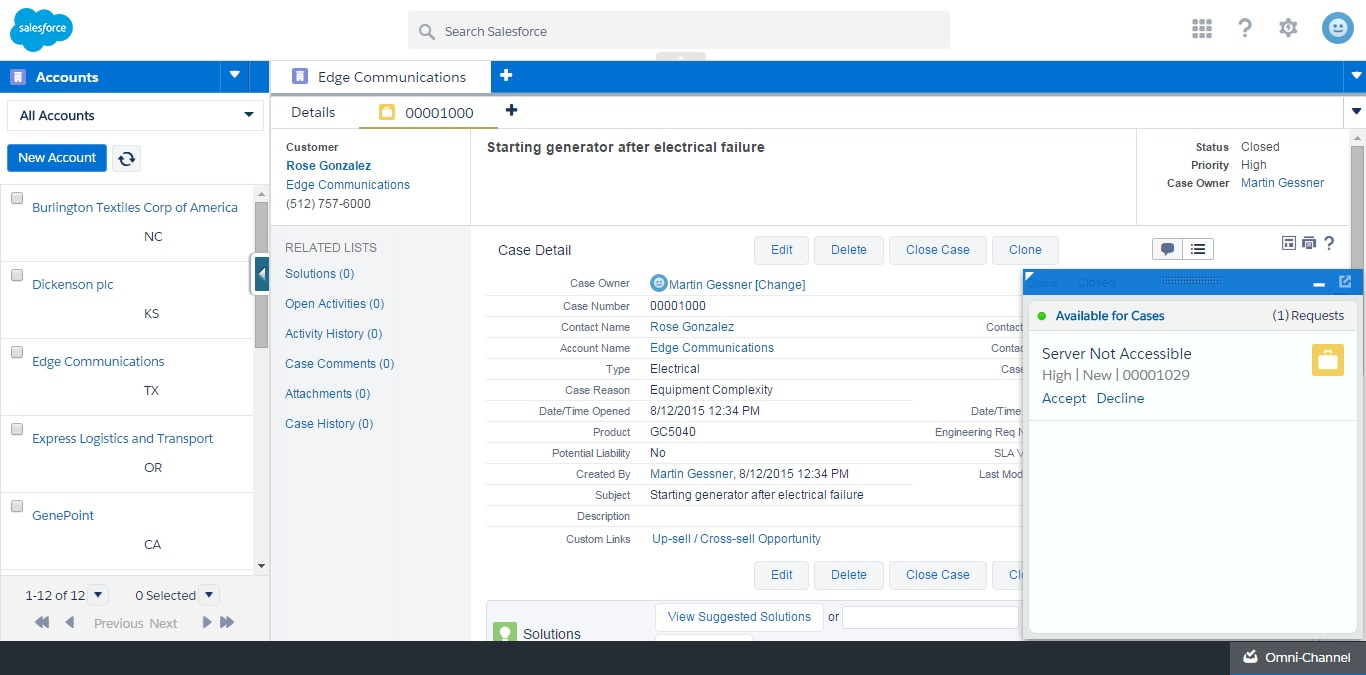
Once accepted the case opens up in a new console tab, and the agent is ready to work on it.
The Omni Channel feature also provides various reporting components that allows operations team to analyze the performance of an agent with respect to presence and response times, as well as the amount of work queued and average time for allocation.
According to the official Salesforce statement (always with a safe harbor disclaimer) claims that the functionality will be further enhanced to include skills based routing logic, as well as a fully equipped manager dashboard for Omni Channel.
The Omni Channel feature adds a much needed work item distribution logic to Salesforce, with a potential to save the cost of purchasing third party routing apps from the AppExchange. Also, don’t forget the Omni Channel feature can be used outside the service context as well, as long as you have a queuing mechanism set up for the object. For example, Omni channel could be used for expense report approval routing for your finance team.
What Certification are you studying for now?
Focus on Force currently provides practice exams and study guides for sixteen certifications