Once you start working in the Salesforce world, it won’t take long until you come across the need to integrate or connect your Salesforce org to an internal or external system. At that point, you will start to hear about API’s. While you may think that is something that only developers need to know and understand it is useful for anyone working with Salesforce to know what they are and how they work, at least at a high level.
API stands for Application Program Interface. Salesforce APIs are a way for other applications (or code in other applications) to programmatically access data within your Salesforce org, in a simple and secure manner. Salesforce can also call APIs to retrieve data from other systems or services, but here we are going to just cover the Salesforce APIs that allow access to Salesforce data. Imagine it to be a door for data to flow in and out of your Salesforce org. You can interact with your Salesforce data via the user interface and via an API.
API Fact: You must have used Dataloader to push and retrieve data from your Salesforce org. Well, Dataloader sends and receives data through one such door (APIs).
Salesforce offers multiple kinds of APIs (different types of doors that is), for the data to move through. They are:
- SOAP API
- REST API
- Apex REST API
- Apex SOAP API
- Bulk API
- Metadata API
- Chatter REST API
- Streaming API
- Tooling API
Each of these APIs has specific uses, for which they are built for. We are going to cover the two elementary APIs – SOAP API and REST API.
SOAP API
SOAP stands for Simple Object Access Protocol, and is an XML based messaging protocol. It is one of the most common integration methodology that you would see in large enterprises, as SOAP has been around for a long time, and many legacy applications support only SOAP integrations. It is also useful to understand the concept of WSDL (Web Service Description Language), which is an XML document that is used to describe and define a SOAP web service request.
Salesforce supports data integration through its proprietary Force.com SOAP API, and lets you do create, retrieve, update and delete operations to Salesforce data from an external application. Salesforce provides 2 kinds of WSDLs:
- Enterprise Web Services WSDL, and
- Partner Web Services WSDL
As the name suggests, Enterprise WSDLs are intended for Salesforce customers and their ISVs, to build integrations specific to their own Salesforce Org. Whereas the Partner WSDL is intended for App development partners, with which a generic integration can be authored that can work with multiple Salesforce orgs.
Let us take a look at one of the enterprise WSDLs. Navigate to Setup | Develop | APIs to see this screen:
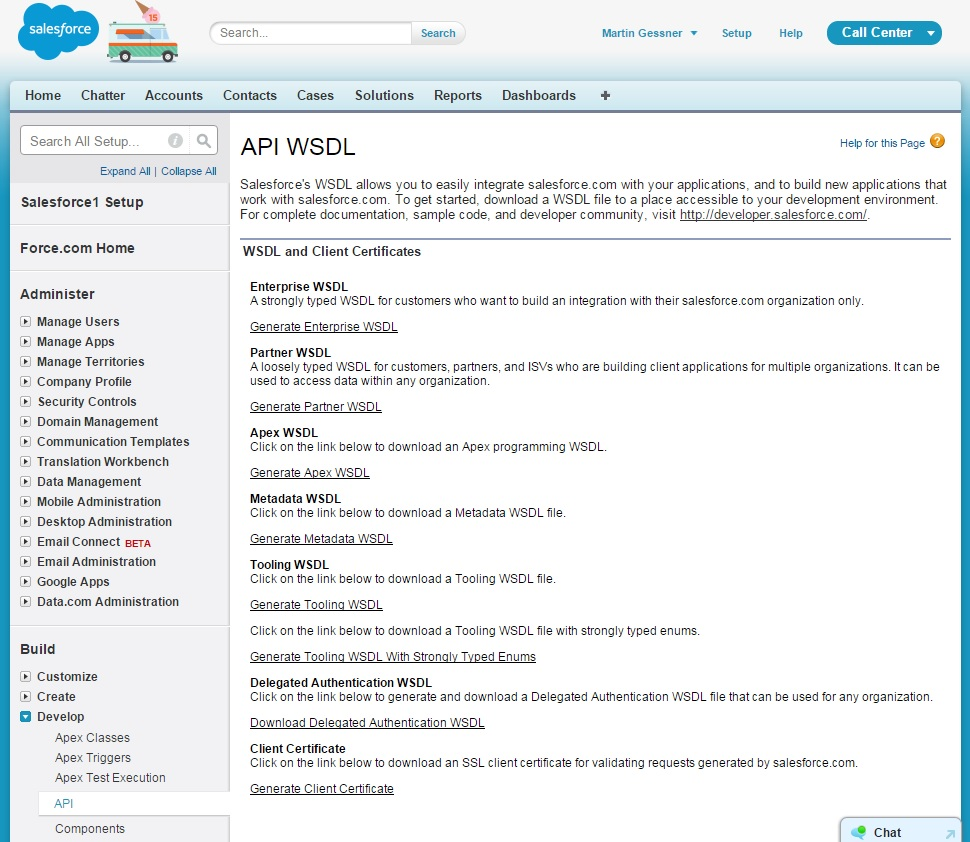
Notice the link to generate Enterprise WSDL. Clicking on this link, would generate the enterprise WSDL for you, and it should look something like this:
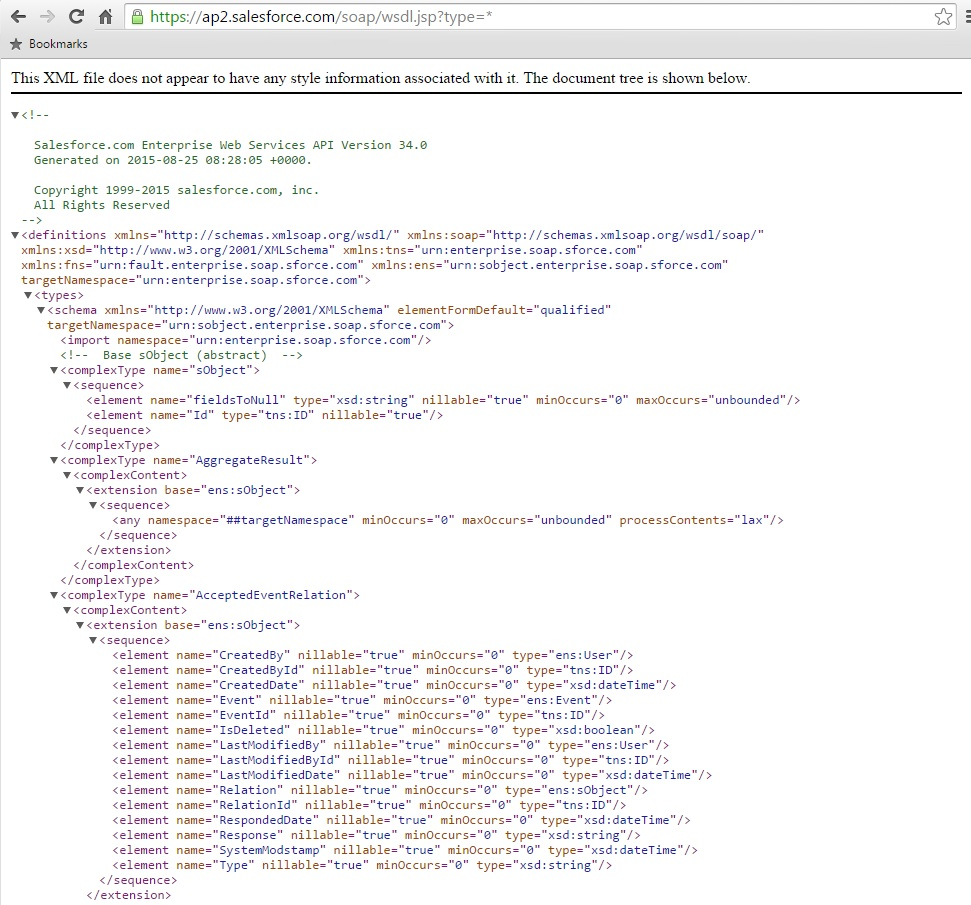
You would use this to author your SOAP integrations. This can be used with any external application that is capable of sending and receiving SOAP based Web Service request. Let’s see how.
Save the enterprise WSDL that you just generated, as an XML file on your hard disk. Then, from the SOAP UI application (http://www.soapui.org/) load this, to create a new SOAP project. Once done, navigate to the Login tag, and create a Request. Fill in your User name and password (which needs to be appended with your security key), and submit the request. Your screen would appear like this:
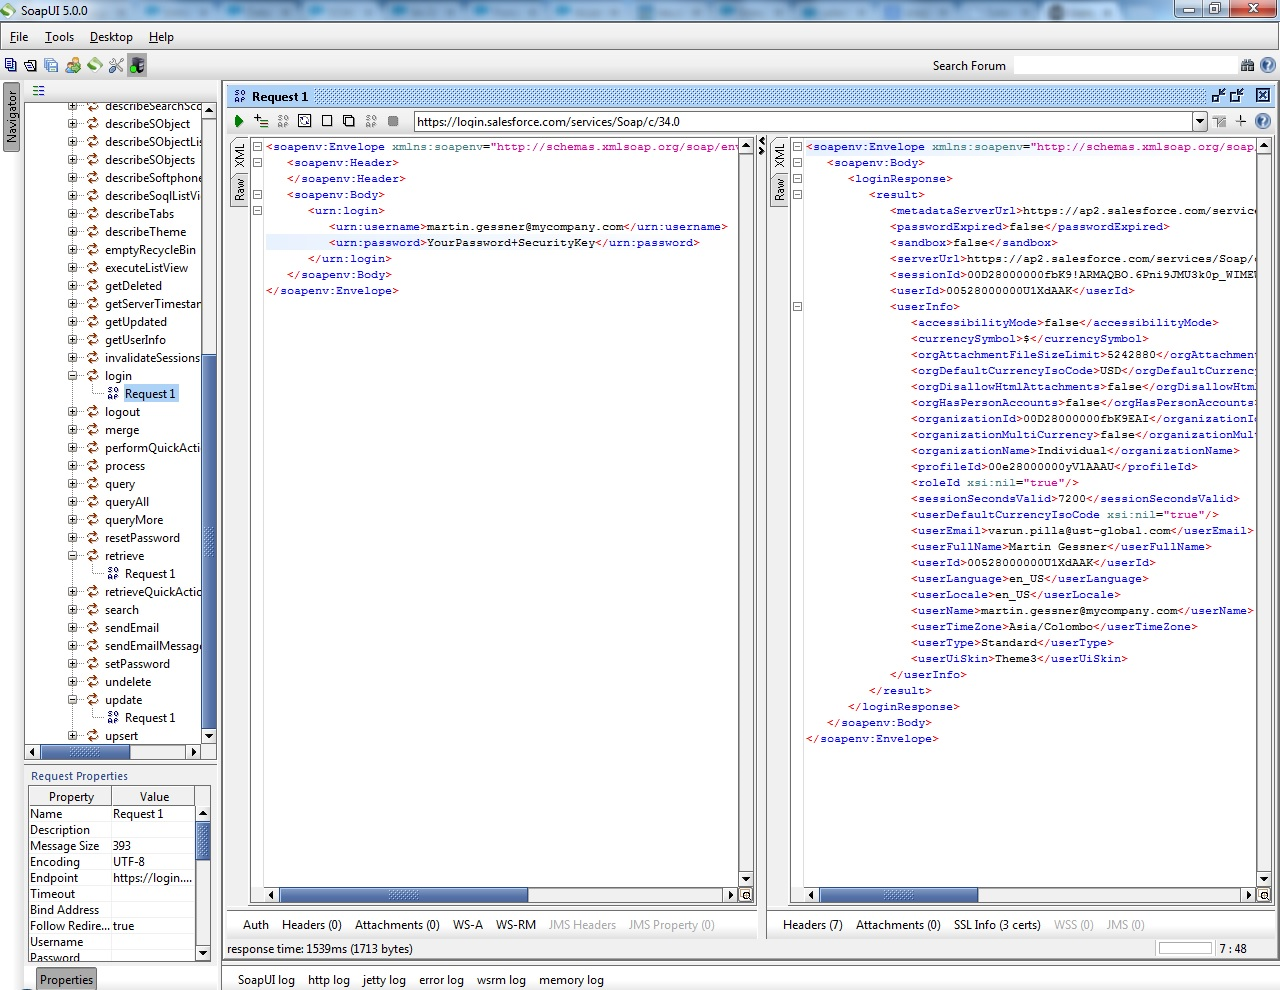
This is a request-response dialogue. In the left hand side you would find the request submitted, which was a simple request for logging in; and on the right hand side you would see the response received. This is what Salesforce return as an answer to your request. Since our request was a login request, the response contains a Session ID, which shows that login was successful.
This is a simple representation of how a SOAP request works. An application which is capable of sending, receiving and understanding SOAP requests can use such requests to read and manipulate data within Salesforce.
REST API
Now let us move to see the second main type of API provided by Salesforce – the Force.com REST API. REST stands for Representational State Transfer, which is considered to be a light weight alternative to SOAP, and therefore preferred by modern web & mobile based applications. The primary difference here is that requests are sent as an HTTP request, rather than a SOAP request.
For instance, a sample REST request for querying all account IDs and account names would look like this:
https://na2.salesforce.com/services/data/v20.0/query?q=SELECT+id,name+from+Account
The response can be received as an XML format or as a JSON (Java Script Object Notation) format. We have already seen what an XML response format looks like. Shown below is how a JSON response format would look like:
{
“Id” : “00423200000as7kAAI”,
“Name” : “Acme”,
}
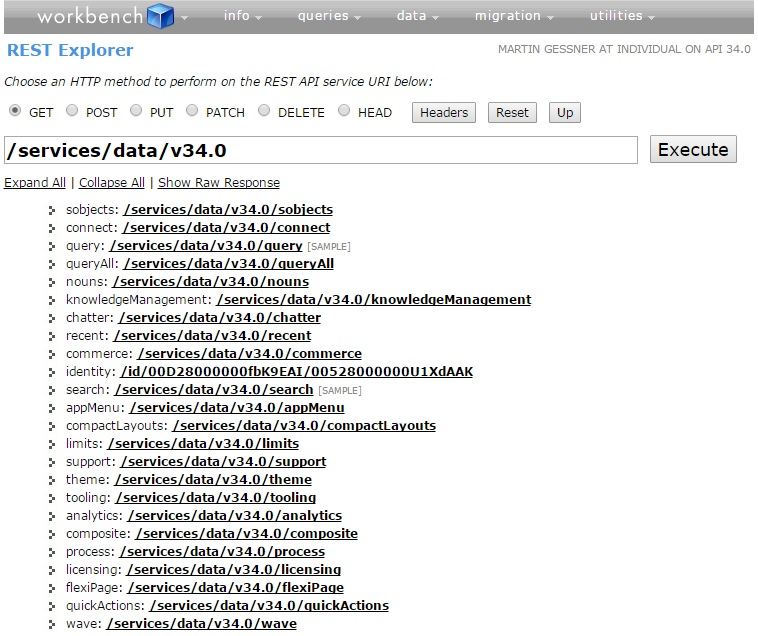
Let’s try it out. While you could use SOAP UI or chrome POSTMAN plugin to REST services, here I am going to use Workbench. Open Workbench and log in to your Salesforce instance. In the Utilities section, choose REST Explorer to bring up a screen as shown below.

Clicking the Execute button would bring up all the available resources that Salesforce offers.
Let us do a query on Account for name and ID. All you need to do is pass the right SOQL statement as a query parameter for GET method. All the spaces in the SOQL statement would need to be replaced by a + sign. Once you have the query constructed, click execute to get the results as shown:
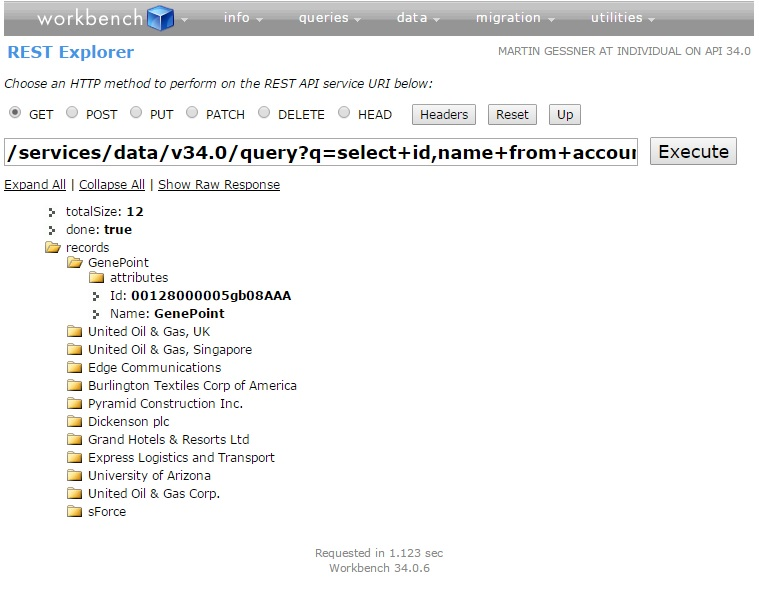
Take a moment to click the “Show Raw Response” URL to see the actual JSON response in the format mentioned above. Workbench intelligently displays this in a consumable format for human use, and hence you don’t see the JSON response by default.
Notice the various methods like GET, POST, PUT, PATCH, etc available, which can be used along with your Force.com REST API. The methods translate to :
GET = READ
POST = CREATE
PUT / PATCH = UPDATE
DELETE = DELETE
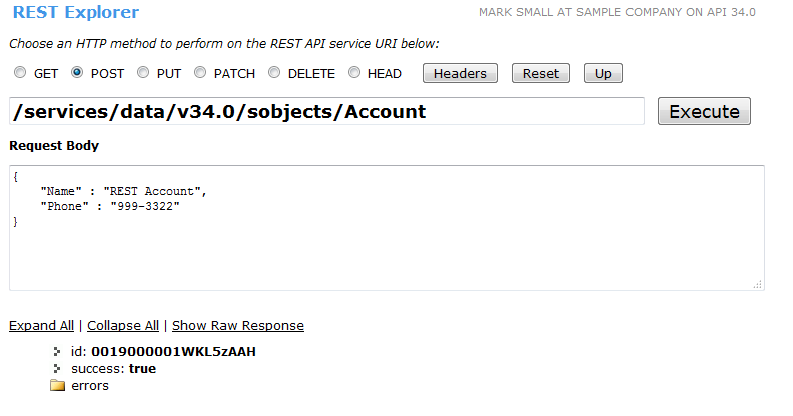
Here is an example of a POST, using the standard Account Rest API. The request body contains a JSON request, in this case to create an account, it contains values for the Name and Phone fields. After pressing the Execute button, the response is returned below. In this case the request was successful, and returned the id of the newly created Account.
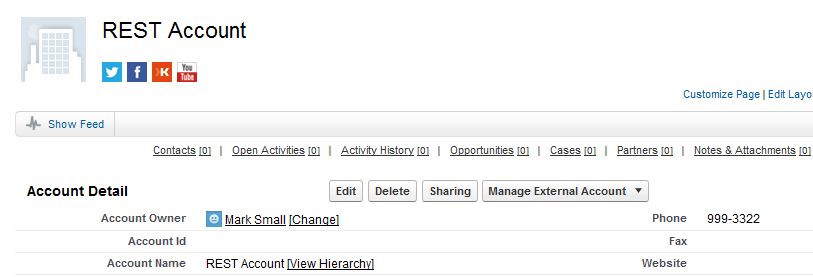
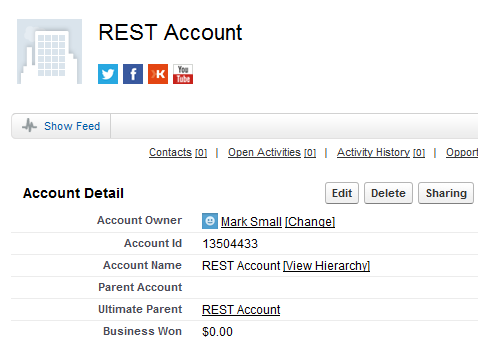
Here is the account that was created ‘REST Account’, with the phone value provided in the JSON request body.
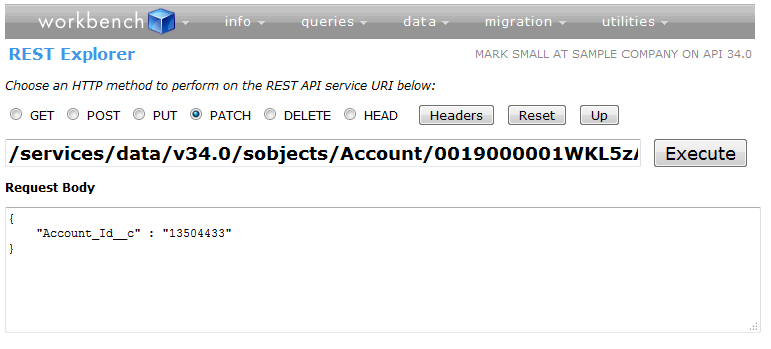
Here is another example using the PATCH method to update the Account Id custom field in the same Account record we just created. Notice that the URI has the record id appended.
Here is the record after update.
Besides the different protocols they use to send and receive data, the other differences between the APIs are:
- SOAP API is more highly structured and strongly typed than REST API
- SOAP API is better in situations where there is a large volume of data that need to be transferred.
- SOAP APIs are usually used in large enterprises with a legacy application backbone
- REST API is good in cases where it has to work together with JavaScript, which usually occurs when you are using it to access Salesforce data from Web or Mobile applications.
- REST APIs are used for modern web & mobile application development
What Certification are you studying for now?
Focus on Force currently provides practice exams and study guides for sixteen certifications

