In this post, we are going to explore how Visual Workflow can be used to clone opportunities and line items. Yes, Salesforce does has a ‘Clone with Products’ and ‘Clone without Products’ option on a single record, but what if your requirements are more complex than that? For example, you may want to control which fields are cloned, or use a naming convention on the cloned opportunity, or set particular field values. You may also want to search for a set of past opportunities, and be able to clone multiple opportunities at once.
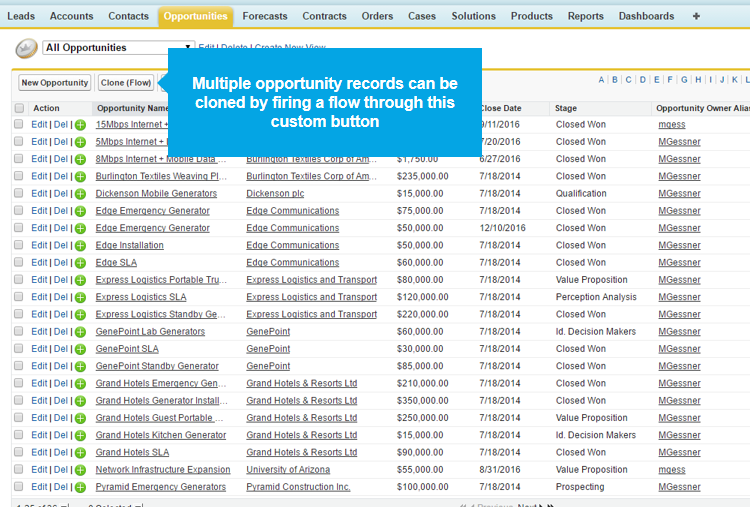
This example will show how to clone multiple opportunity records, including the opportunity products, on a list view by calling a Visual flow from a custom button.
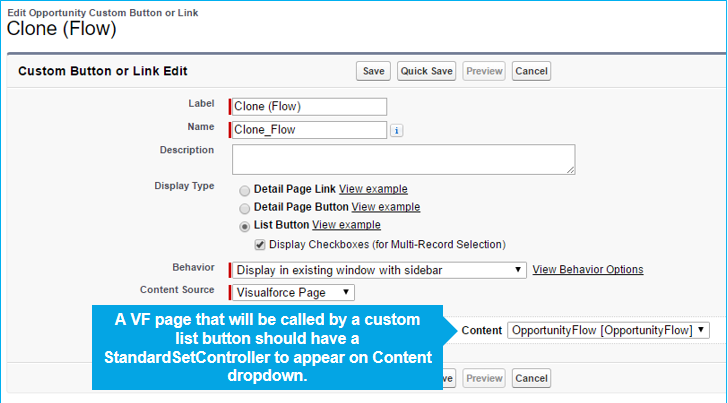
Step 1: Calling the Flow from a custom button on a list view
- The flow is initiated by creating a custom button on the opportunity object
- The button is associated with a VisualForce page that has a StandardSetController
- The button needs to be added to the list view layout.
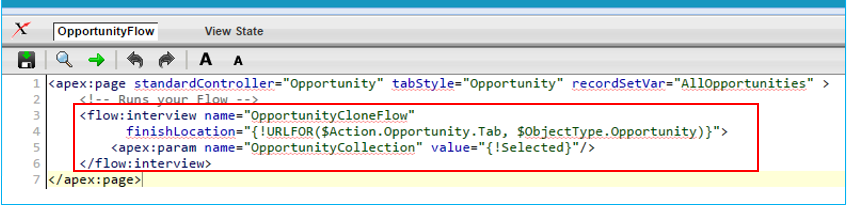
- Take note of the name on the <apex:param tag which will be used as an SObject Collection on the flow itself.
- The name on <flow:interview VF page tag points to the name of the flow and initializes it as well.
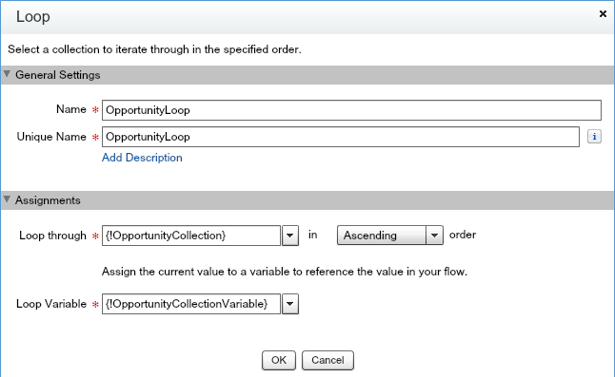
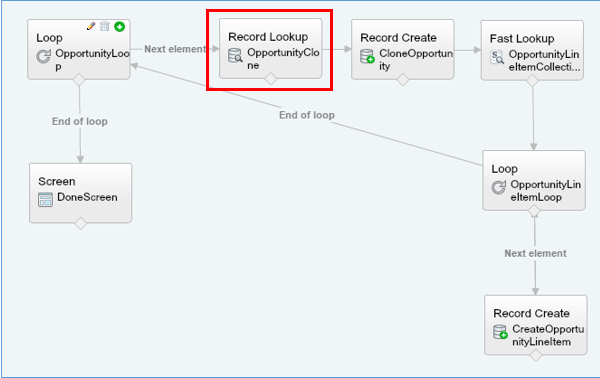
Step 2: Loop through the selected Opportunity Records
- The green arrow indicates the flow starting point.
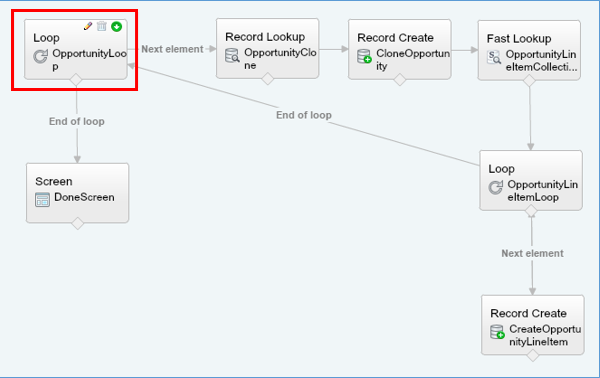
- The loop iterates through values of the OpportunityCollection (an sObject Collection) of selected records:[crayon-6114a4c163c07988492934/]
- This is how the records chosen from the list view passed to the flow.
- The loop will continue until all records are processed.
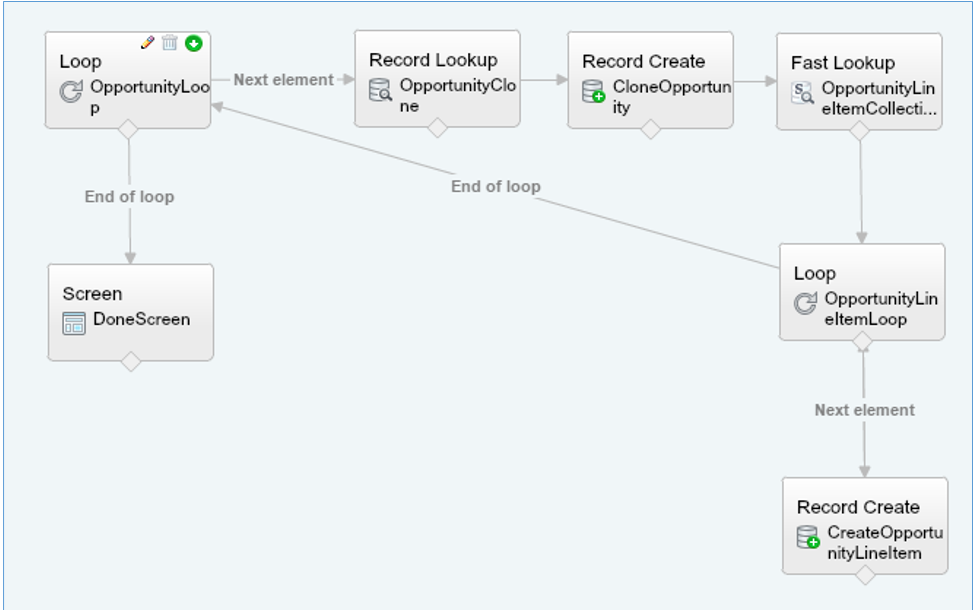
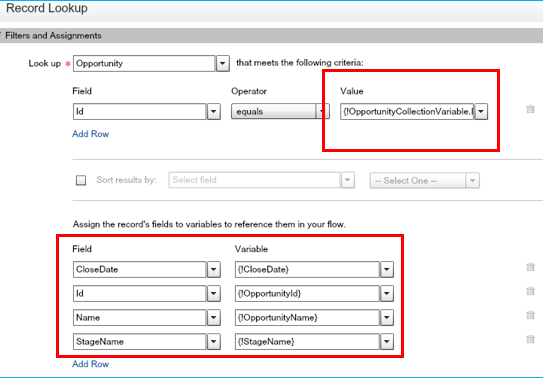
Step 3: Record Lookup
- The OpportunityClone loop processes records one by one.
- At this stage, each record from the OpportunityCollection will be passed to the OpportunityCollectionVariable and will be queried based on the criteria.
- Variables that will store the fields to be added in the clone are defined.
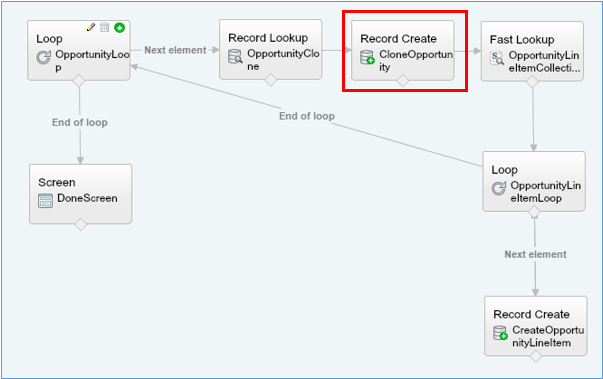
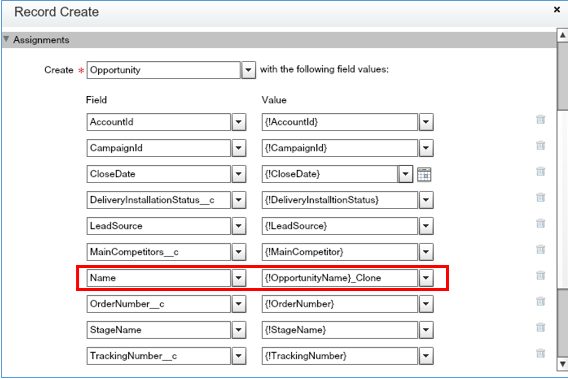
Step 4: Create the Opportunity Record
- The next step is to create an opportunity record and assign field values
- Field values can be assigned through the previously queried flow variables
- It is important to save the new opportunity Id to a variable, as it will to clone the opportunity line items/products.
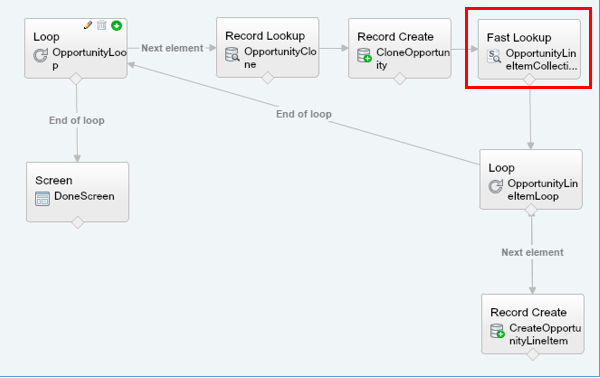
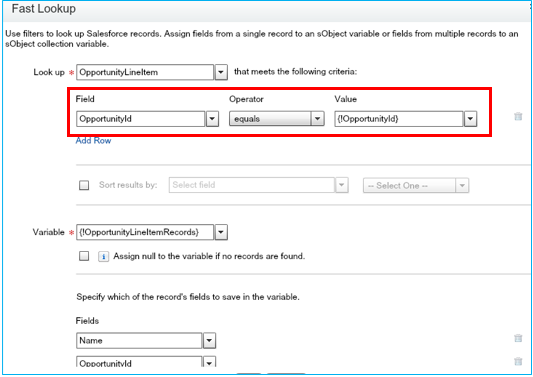
Step 5: Create the Opportunity Line Item records
- As compared with Record Lookup, Fast Lookup can deal with multiple sObjects or collection of sObjects.
- This is suggested to be able to deal with two or more opportunity line items per opportunity.
- This block will query all the opportunity line items based on the source OpportunityId
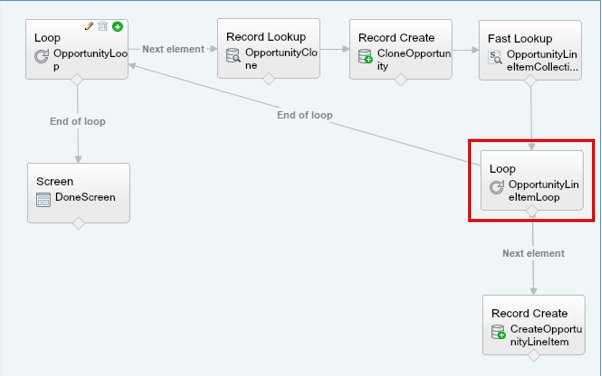
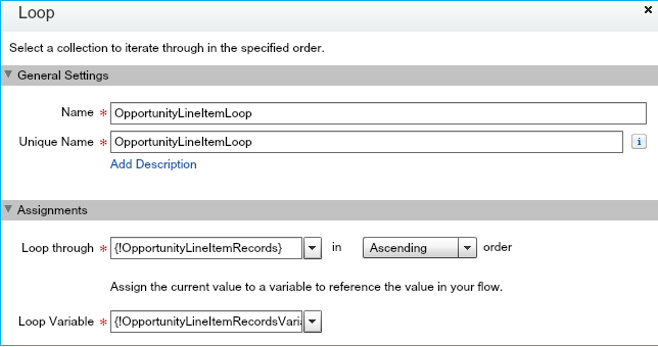
- This loop will iterate all the records queried in the previous Fast lookup (stored on the OpportunityLineItemRecords collection variable).
- As with the first loop, this will iterate until all records are processed.
- The records will be saved one by one in the OpportunityLineItemRecordsVariable variable during processing.
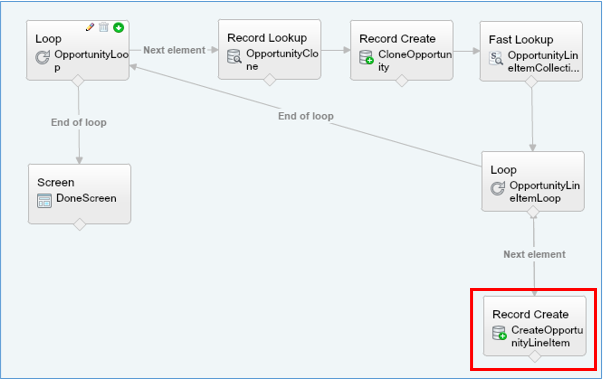
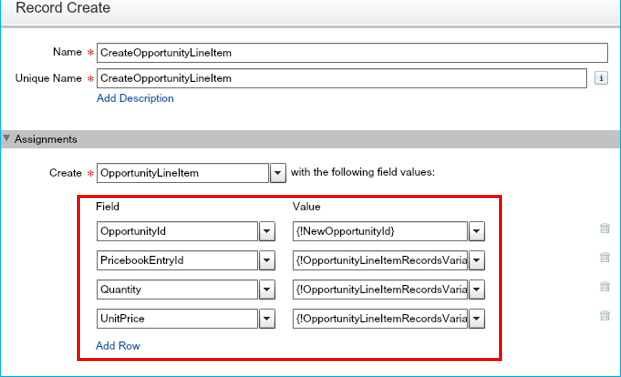
- As with the CloneOpportunity Record Create, this is where the cloning of opportunity line items/product takes place.
- New records are created with the same field values as the original records.
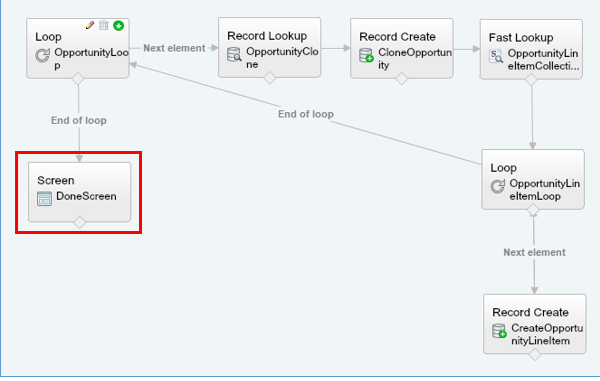
- As you can see, arrows are pointing to each other, meaning, as long as the loop still have line items records to iterate, it will continue to create, otherwise, it will go back to the first opportunity loop for the next opportunity record, if there are any.
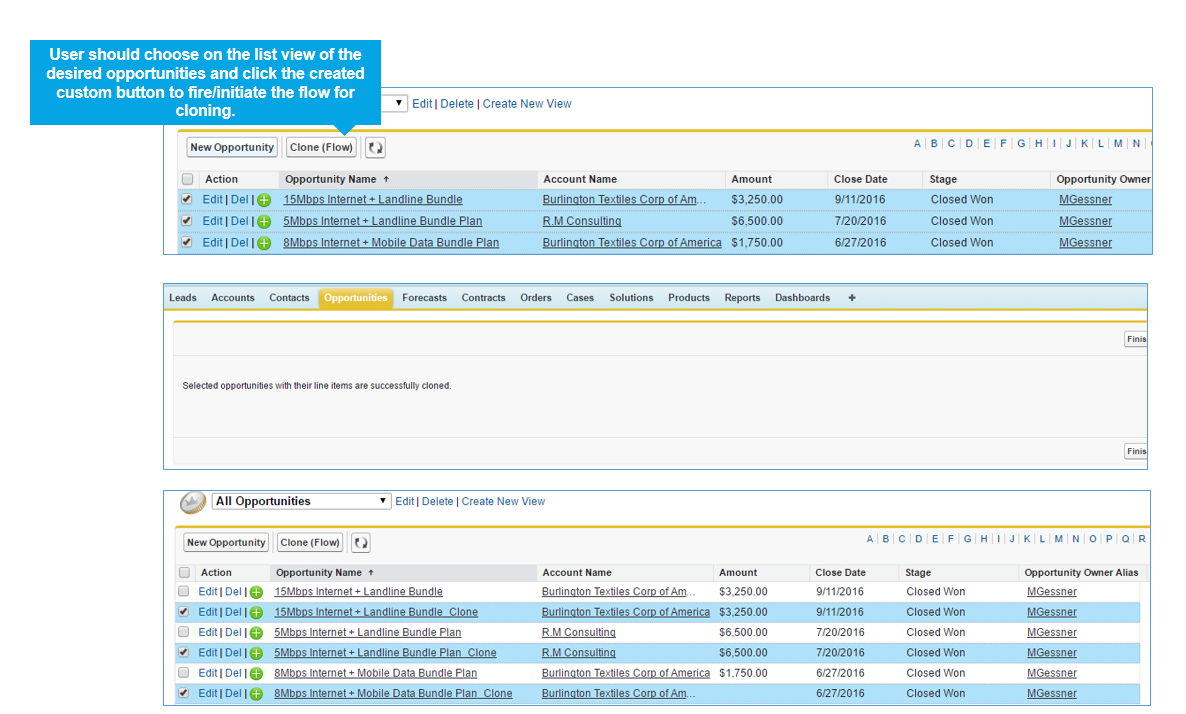
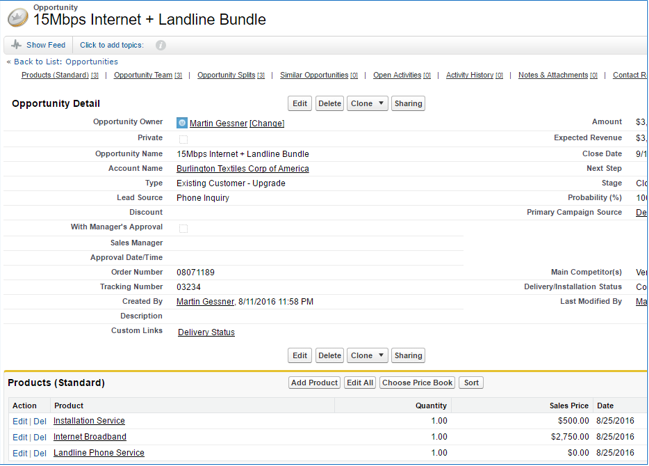
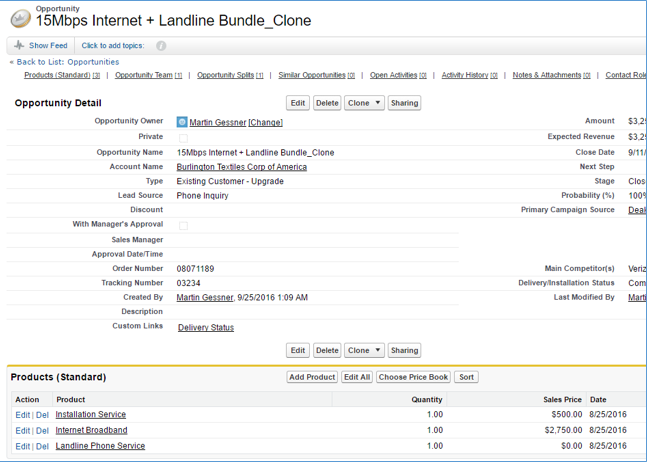
The Flow in Action
- The following screenshots show 3 records selected, using the Clone button and the resulting cloned record, including the opportunity products.
What Certification are you studying for now?
Focus on Force currently provides practice exams and study guides for sixteen certifications